Setting Up the Chrono Racelogic in SimHub
The Racelogic lap timer is set up in a few minutes with SimHub and the AGRacing.fr plugin: it installs the DNR Chrono dashboard, configures the screen and selects it automatically. Follow the 5 steps below.
The software SimHub is required to set up and use the Racelogic display.
You will also need the AGRacing.fr plugin for SimHub.
Download the AGRacing.fr plugin
Download the AGRacing.fr plugin for SimHub: it adds a tab dedicated to your AG Racing screens and takes care of the whole setup.
Install the plugin in SimHub
Copy the AGRacing.SimHub.Plugin.dll file into the SimHub installation folder, usually C:\Program Files (x86)\SimHub. Open SimHub, go to “Add / Remove features”, enable “AGRacing.fr”, then restart SimHub.
On first start, the plugin installs its DNR Chrono and DNR Endurance dashboards itself: no more profiles to download or import.
Add the Racelogic in one click
Plug the Racelogic in over USB. In SimHub, open the “AGRacing.fr” tab: on the home page, click “Set up” under Racelogic, then “Add a Racelogic”. The plugin creates the screen, sets reversed landscape, enables touch and ties it to its USB port: nothing left to do in the “Devices” tab.

The dashboard is already selected
“DNR Chrono Dashboard AGRacing” is selected automatically in “Dashboard shown”. To use another one, just pick it in the list: every dashboard installed in SimHub shows up there.
Customise the dashboard (optional)
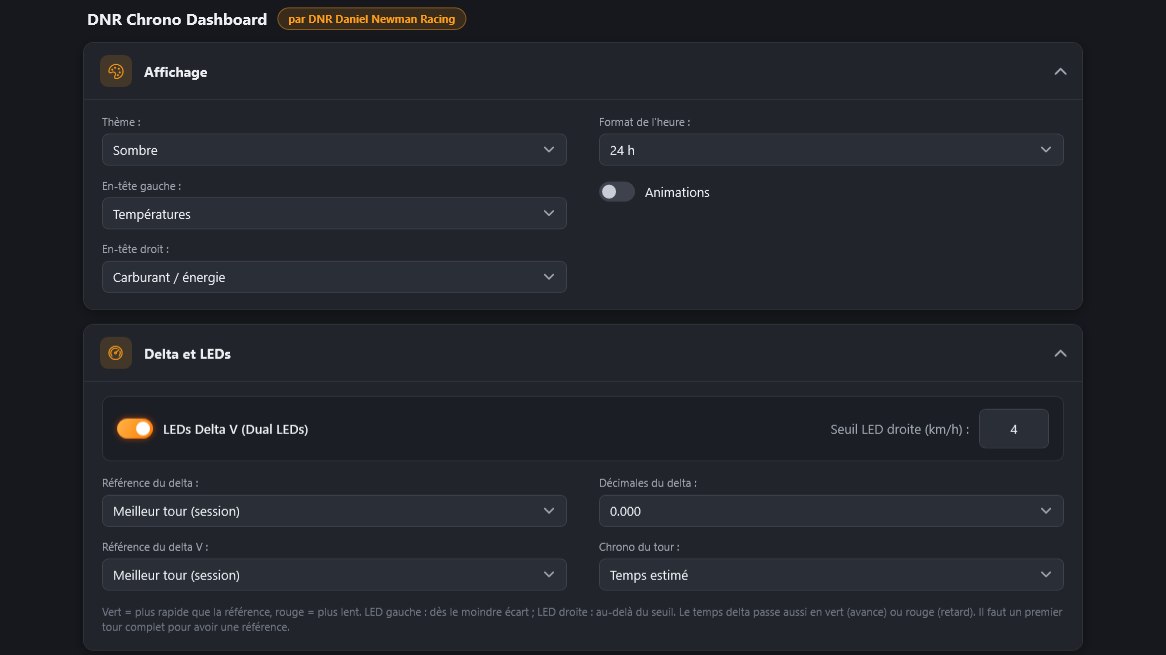
Below the screen list, the DNR Chrono dashboard settings apply live: dark or light theme, headers, Delta V LEDs (Dual LEDs) and their threshold, delta reference, on-screen position and scale, idle screen (name, number, background and colours) and active screens.
If the plugin says automatic setup is not available with your SimHub version: in the “Devices” tab, add a “Vocore” device, set the rotation to “Reversed landscape”, enable touch, then pick “DNR Chrono Dashboard AGRacing” as the main dashboard.
Setup Complete
Your Racelogic screen is now set up with the DNR Chrono Dashboard in SimHub.